


Working on big YAML manifest files and managing them can be a great headache oftentimes. Comes into picture Monokle by Kubeshop. A tool that can save a lot of your efforts and time and reduce your workload. So what is Monokle and why use it and how it can help you? We will see about this later on in the post.
Let's first see what are the pre-requisites for following this article.
Pre-requisites
A little knowledge about YAML files and how to work with them. That's it.
If you have a little knowledge about what is Kubernetes, what are objects in K8s (Kubernetes) then it is a bonus. But in case you don't then we will have a brief discussion on what it is.
What is Kubernetes?
At its base level, Kubernetes or K8s is a container orchestration tool but it is not limited to this. It also offers some additional features that make it more than a container orchestration tool.
What is Kubernetes Objects?
Technical Definition of K8s Objects is
Kubernetes objects are persistent entities in the Kubernetes system. Kubernetes uses these entities to represent the state of your cluster.
In simple words, for various problems Kubernetes solve, there are various entities or components in K8s. Using these entities we can use various features of K8s and know the state of our cluster like what containerized applications are running, resources available to them, and much more.
Some K8s Objects
Pods
It is the most basic scheduling and deployable unit in Kubernetes in which we can run one or more containers with shared computing and network resources.
Deployments
It is used to manage pods like how many pods to have at all times and whenever a pod goes down it starts a new pod and so we do not have to manually manage our pods and so on.
What are manifest files?
These are YAML files used to create K8s objects declaratively. These files are used to tell K8s what is the desired state of an object and Kubernetes then ensure that this state is maintained.
So, now you might be wondering what is Monokle and why do we need it to manage and debug our manifest files. So, let us see what it is and how it can help us.
Monokle
Monokle is a tool that helps us in having a bird's eye view of our manifest files and allows us to quickly navigate in it and make changes to them.
It offers many features that can help us in our DevOps journey and also even you are working in production it can greatly increase your productivity and reduce your workload. Because as the size and complexity of manifest increases, it becomes hard to create and navigate through them to edit them.
Now, you might be wondering where does Monokle lies in the DevOps cycle. Monokle lies in the part where we have to deal with YAML manifest files - the part between the development of an application using code editors or IDEs like VSCode and management of running resources using cluster dashboards like Lens.

Now, let us see one of these features of Monokle which is also the main topic of this blog -
How to create custom YAML manifest templates in Monokle
For simplicity and to make this blog beginner-friendly we will create a template for pods manifest files.
Setting Up the Project
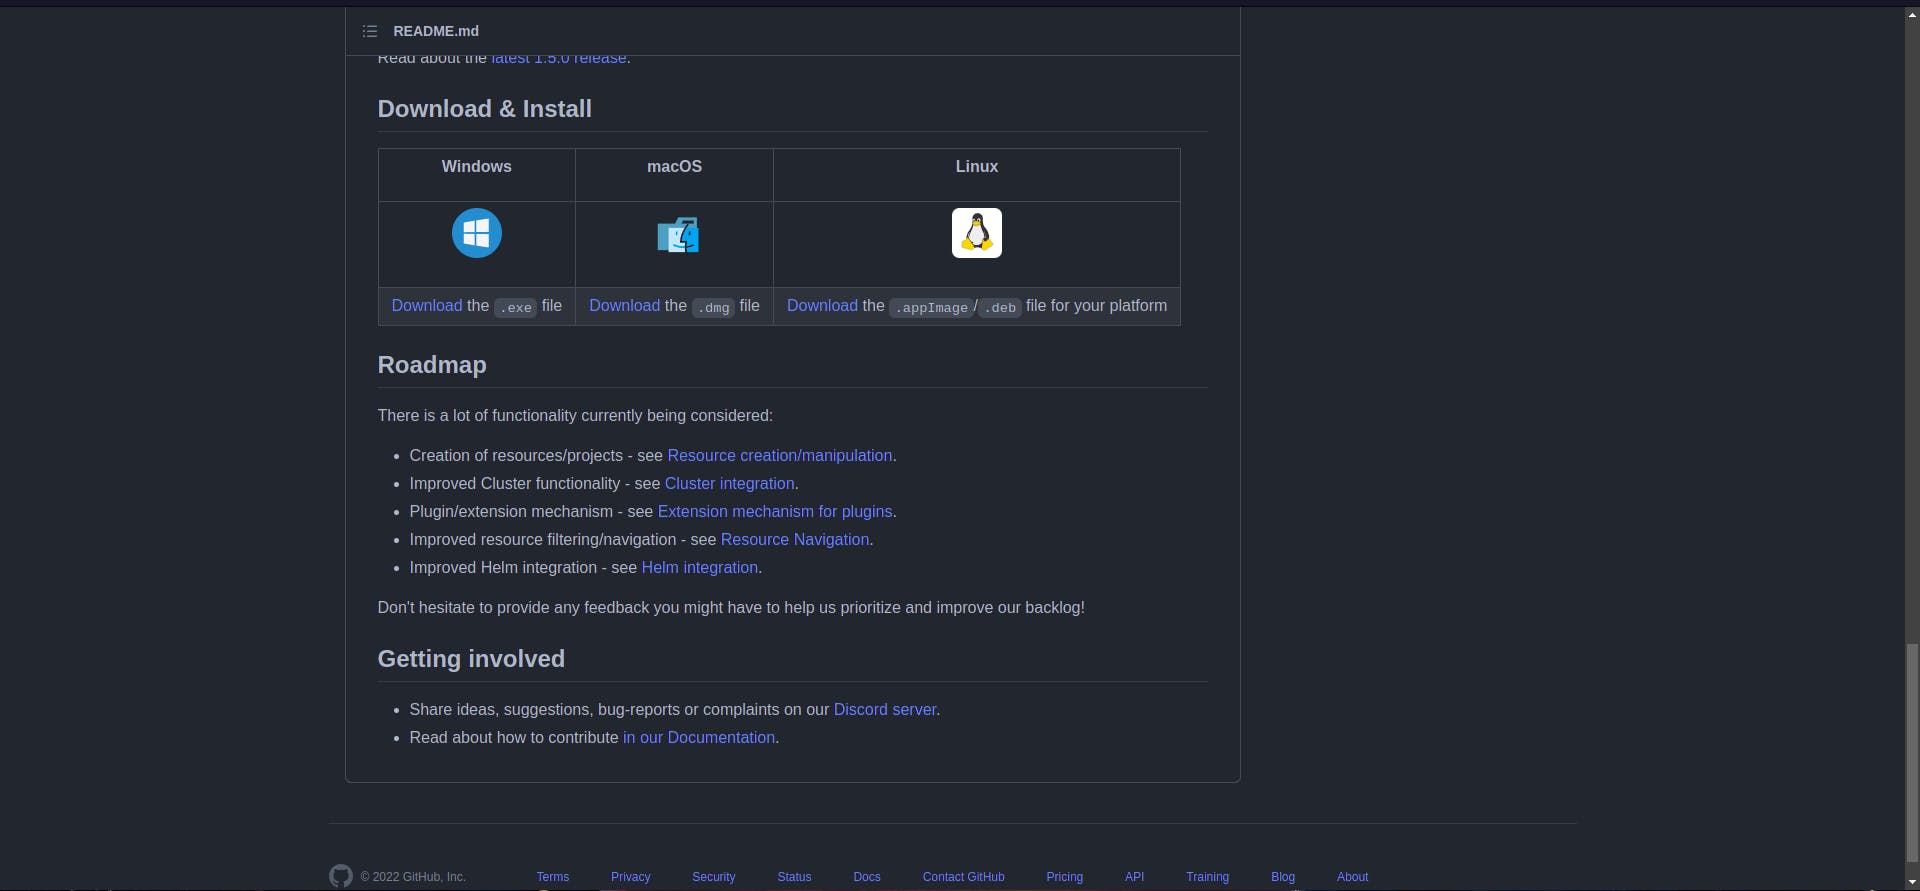
1. First things first, go to official website of Monokle and click on download Monokle.
2. Then select whichever OS you have and download the setup for it. I have Linux so I downloaded the setup for it.
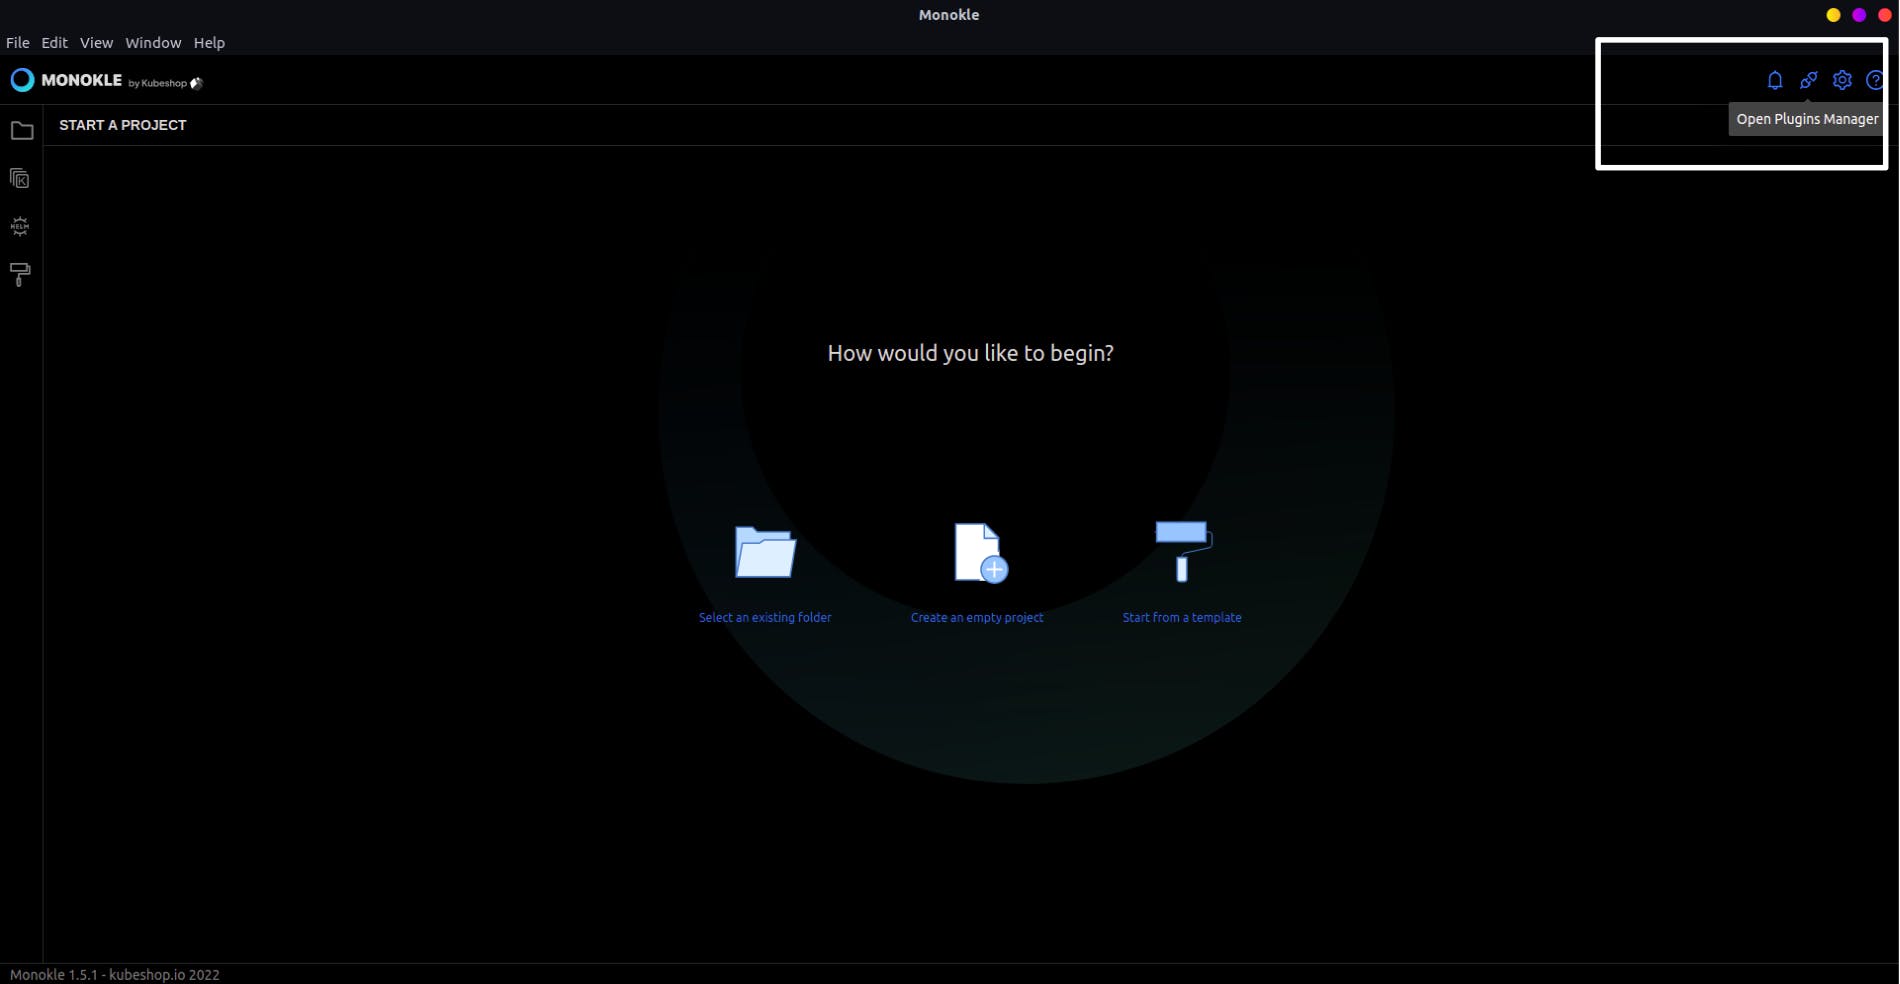
3. After this, install Monokle on your computer and open it. A window similar to below will appear.
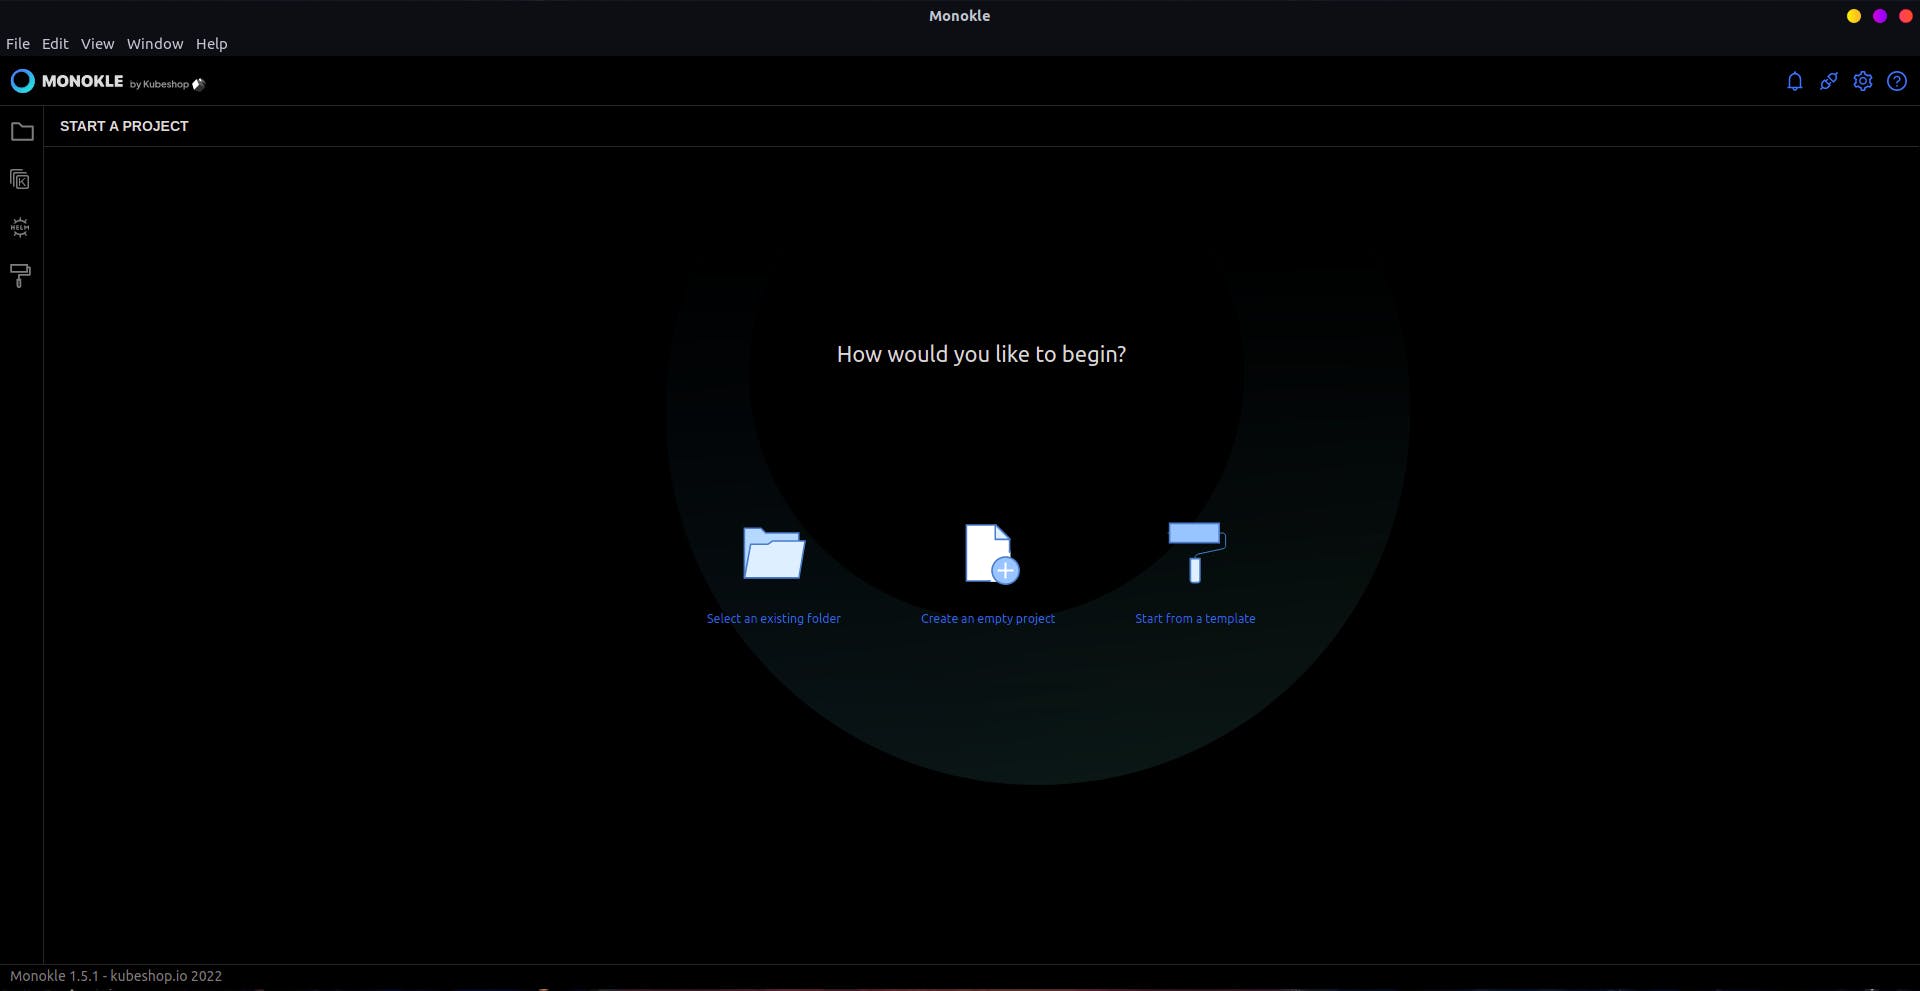
Now, since Monokle is installed, let's get going and create our first template for manifest files.
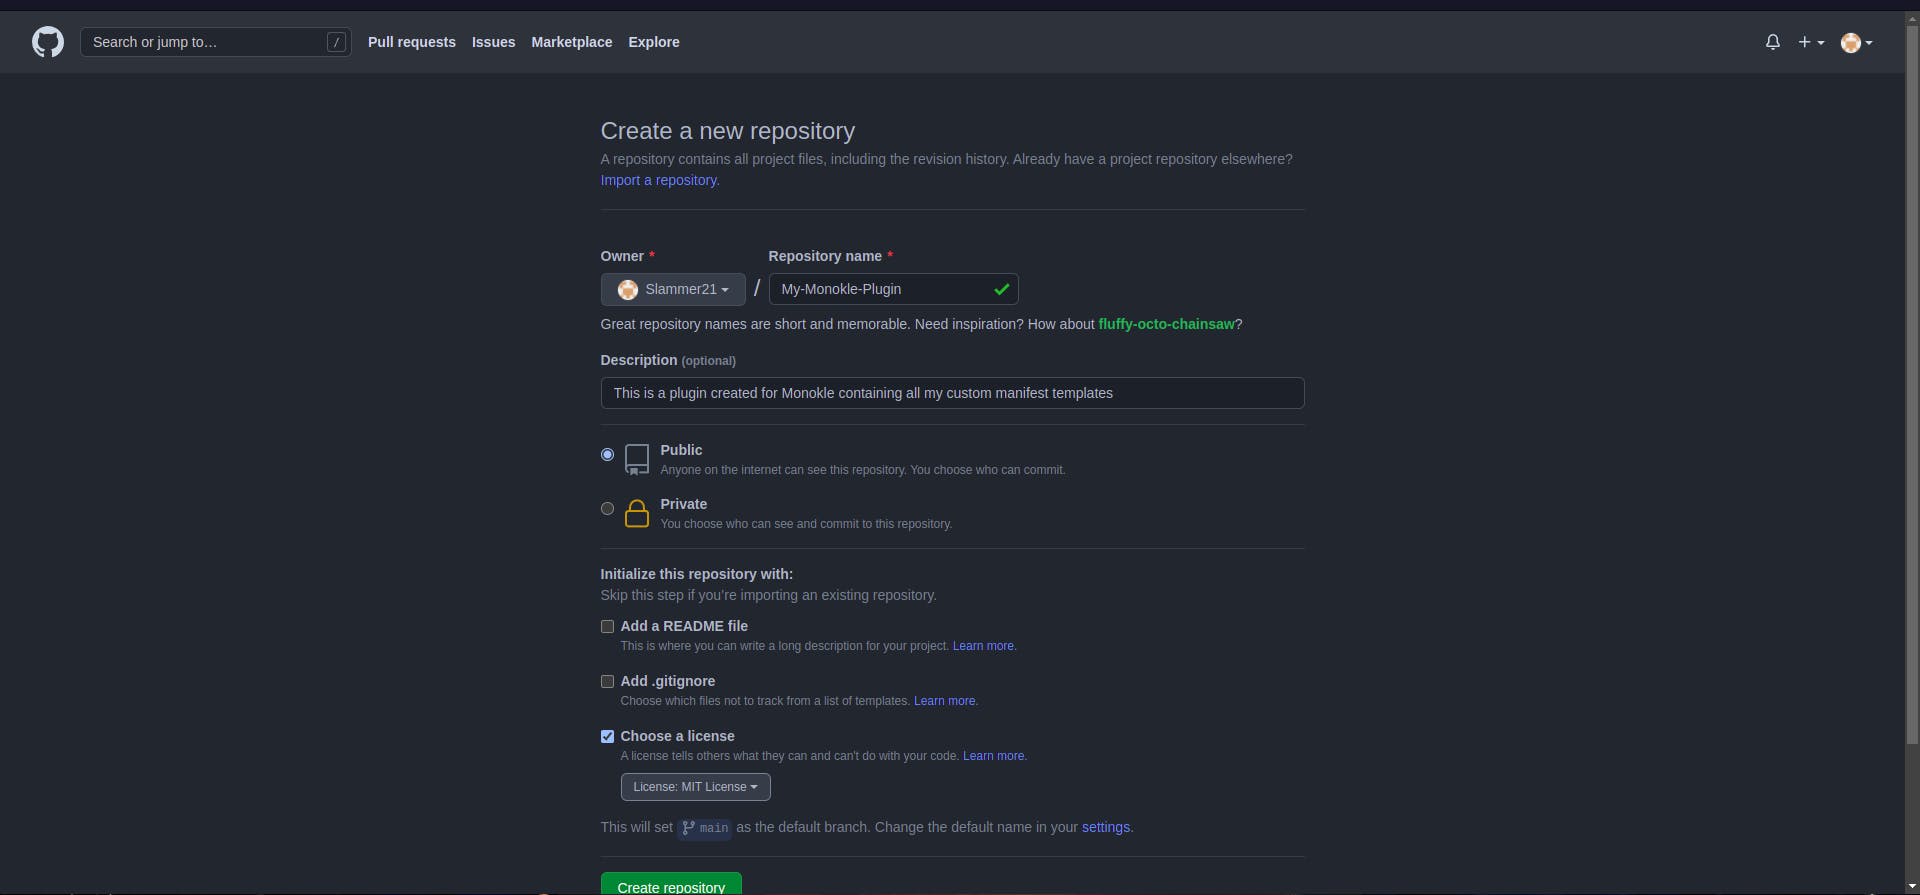
4. Now we have to create a GitHub repository so that we can create a plugin to install our templates in Monokle.
A plugin is simply a GitHub repository in which a package.json file is present for Monokle and this plugin is used to install templates in Monokle.
So, go on GitHub and create a repository with any name of your choice and clone the repository onto your local system.
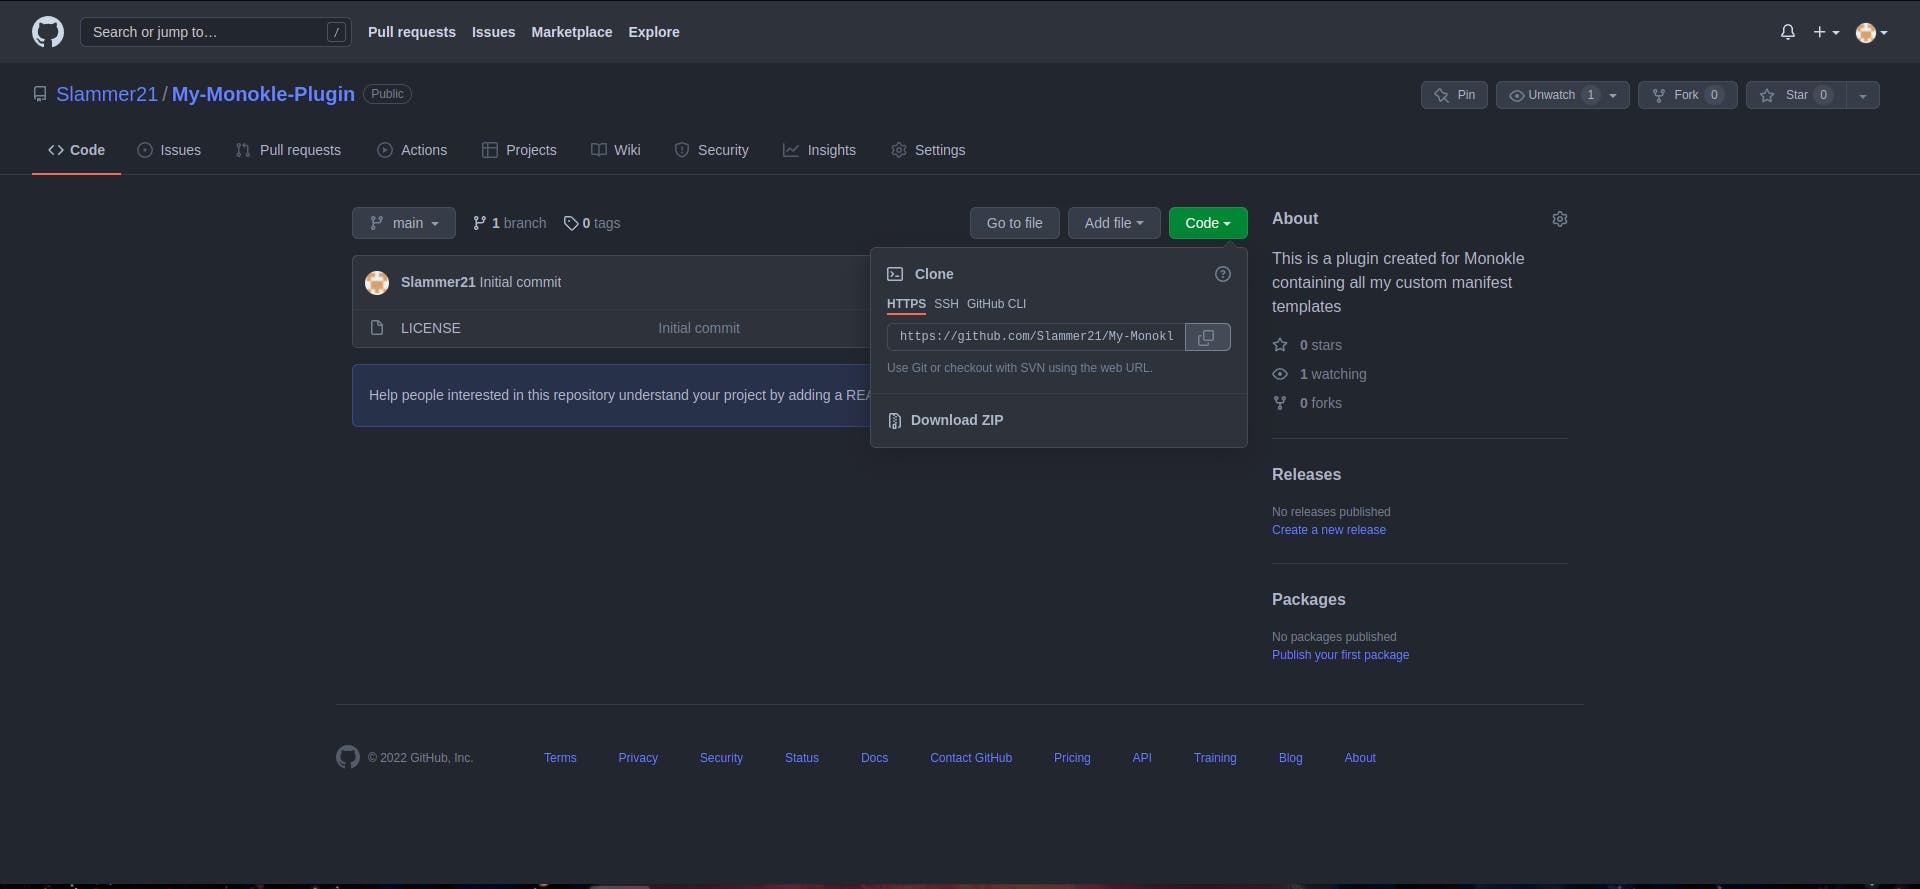
5. After cloning, open the repository on your local system in your favorite code editor like VSCode, etc.
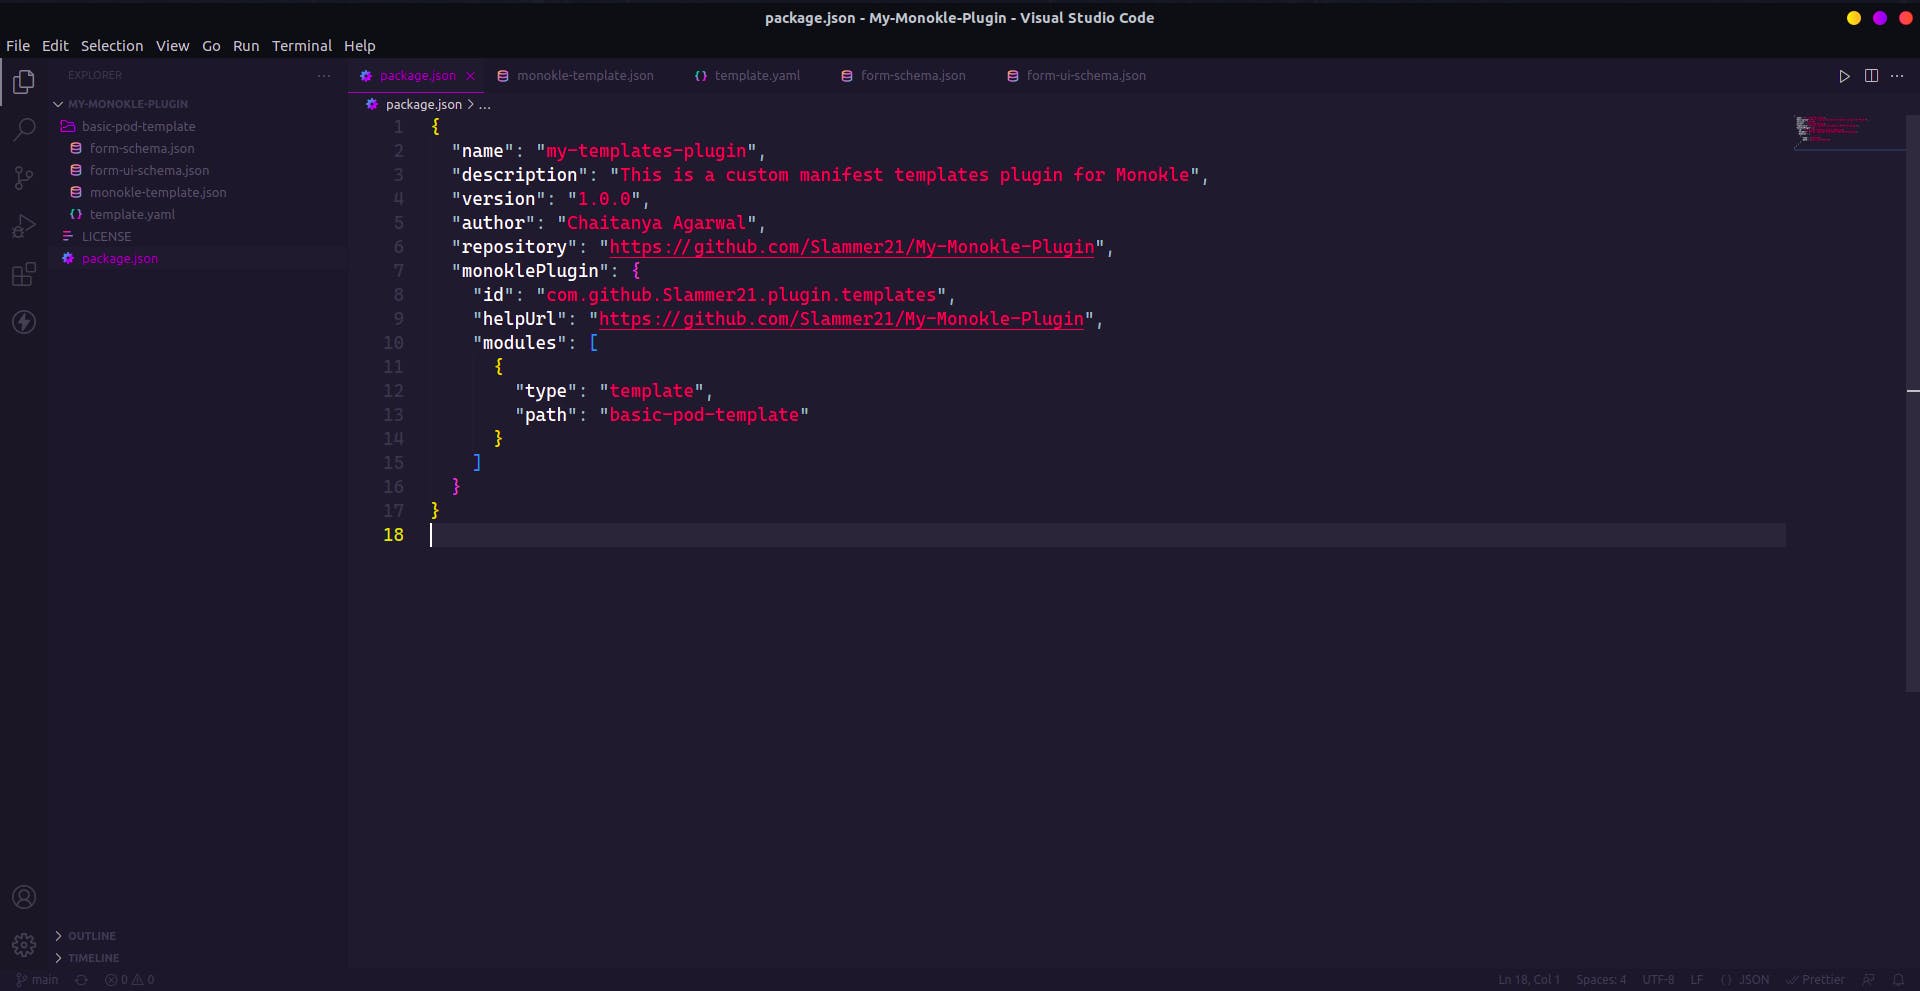
6. Now create a file named package.json and add the following lines to it:
{
  "name": "NAME_OF_PLUGIN",
  "description": "DESCRIPTION",
  "version": "VERSION",
  "author": "NAME_OF_AUTHOR",
  "repository": "GITHUB_REPO_LINK",
  "monoklePlugin": {
    "id": "com.github.YOUR_GITHUB_USERNAME.plugin.templates",
    "helpUrl": "URL_IN_CASE_OF_ANY_HELP_RELATED_TO_YOUR_TEMPLATE",
    "modules": [
      {
        "type": "TYPE_OF_MODULE",
        "path": "RELATIVE_PATH_TO_MODULE"
      }
    ]
  }
}
Currently, monokle supports only templates type modules but it will support more module types in the future.
For example:-
7. Now, make a directory with the same name as what we gave as the value of path in package.json as this directory will be used to create the template.
So, from the above example, the name of the directory will be basic-pod-template.
Every Monokle template have these parts:-
- Monokle template configuration
- Form configuration
- A Kubernetes YAML manifest placeholder
So, let us create these now.
Creating Monokle Template Configuration
This file tells that this is folder is a template and which type of template it is. There are two types of templates that we can currently make:-
- Vanilla Templates
- Helm Chart Templates
In this blog, we will be making a vanilla template in which we must provide the manifests that will be generated as an output. So, lets us get started:-
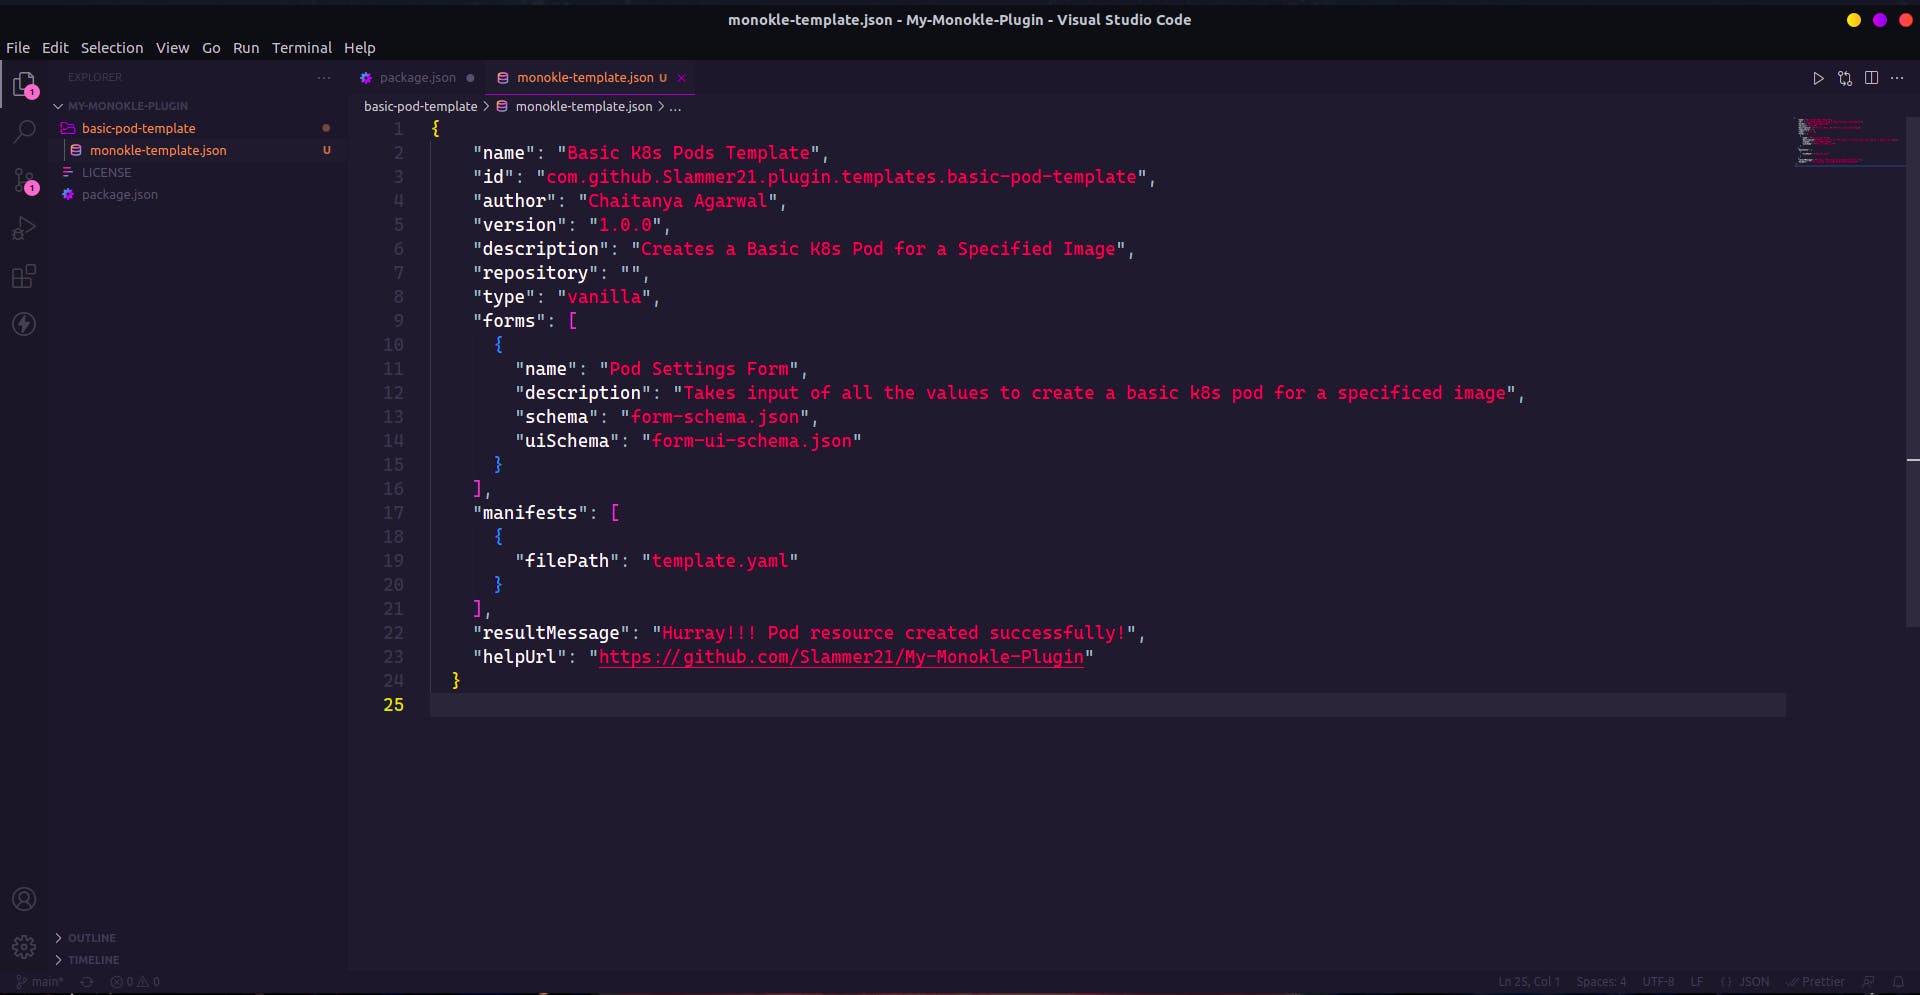
Create a file monokle-template.json in the directory you made, with the following lines in it. In my case, it is basic-pod-template directory:-
{
  "name": "NAME_OF_YOUR_TEMPLATE",
  "id": "com.github.YOUR_GITHUB_USERNAME.plugin.templates.basic-pod-template",
  "author": "NAME_OF_AUTHOR",
  "version": "VERSION_OF_TEMPLATE",
  "description": "DESCRIPTION",
  "repository": "REPO_LINK",
  "type": "vanilla",
  "forms": [
    {
      "name": "NAME_OF_FORM",
      "description": "DESCRIPTION",
      "schema": "form-schema.json",
      "uiSchema": "form-ui-schema.json"
    }
  ],
  "manifests": [
    {
      "filePath": "PATH_TO_MANIFEST_TEMPLATE"
    }
  ],
  "resultMessage": "MESSAGE_TO_BE_SHOWN_ON_SUCCESS",
  "helpUrl": "URL_IN_CASE_OF_ANY_HELP_RELATED_TO_YOUR_TEMPLATE"
}
For example:-
Let us create form configuration files now.
Creating Form Configuration files
There are two files in this:-
- Form schema file - this file defines the basic fields of the form that Monokle will request when we will create a pod and that will be sent to the template manifests
- Form UI schema file - this file contains all the information about how to render the form. Monokle uses the React-Schema-Form component to render template forms for the provided schemas
Create form-schema.json with the following lines in it:-
{
  "type": "object",
  "required": ARRAY_SPECIFYING_WHICH_FIELDS_ARE_REQUIRED,
  "properties": {
    "name": {
      "type": "TYPE_OF_DATA",
      "default": "DEFAULT_VALUE"
    },
    "namespace": {
      "type": "TYPE_OF_DATA",
      "default": "DEFAULT_VALUE"
    },
    "image": {
      "type": "TYPE_OF_DATA",
      "default": "DEFAULT_VALUE"
    }
  }
}
For example:-
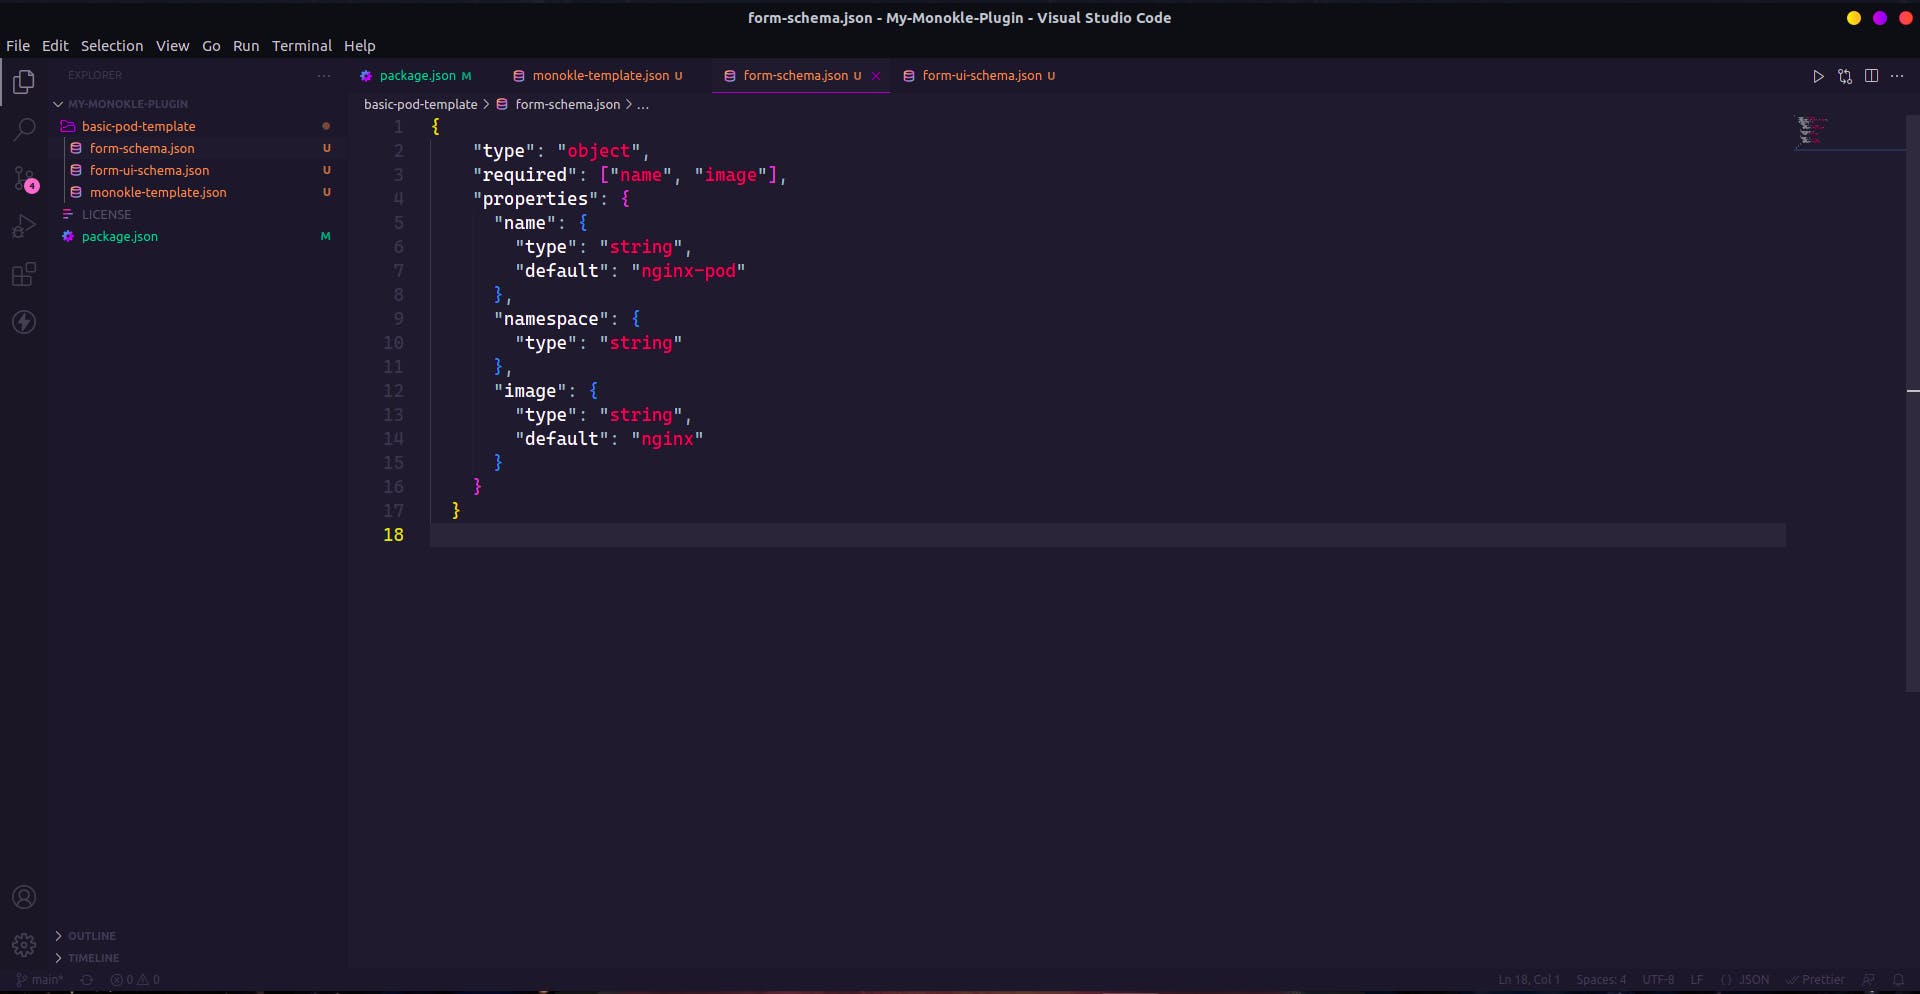
Here we specified three fields that need to be asked in the form to create a pod.
Now, create a form-ui-schema.json with the following lines in it:-
{
  "name": {
    "ui:title": "TITLE_IN_FORM",
    "ui:help": "HELP_TEXT"
  },
  "namespace": {
    "ui:title": "TITLE_IN_FORM",
    "ui:help": "HELP_TEXT",
    "ui:widget": "WHICH_MONOKLE_PREDEFINED_WIDGET_TO_USE"
  },
  "image": {
    "ui:title": "TITLE_IN_FORM",
    "ui:help": "HELP_TEXT"
  }
}
For example:-

Now let us create a YAML template manifest.
Creating YAML template manifest
This is the K8s manifest template with placeholders that will be populated with values from the form and a Kubernetes manifest file will be generated as output.
So, create a file with the same name as we passed in the monokle-template.json manifests part. For example, in my case, it is template.yaml and add following lines in it:
apiVersion: v1
kind: KIND_OF_K8S_OBJECT
metadata:
  name: [[forms[0].name]]
[[ forms[0].namespace ? "  namespace: " + forms[0].namespace + "\n" : ""]]
spec:
  containers:
      - image: [[forms[0].image]]
        name: [[forms[0].name]]
        resources: {}
        ports:
           - containerPort: 80
For example:-
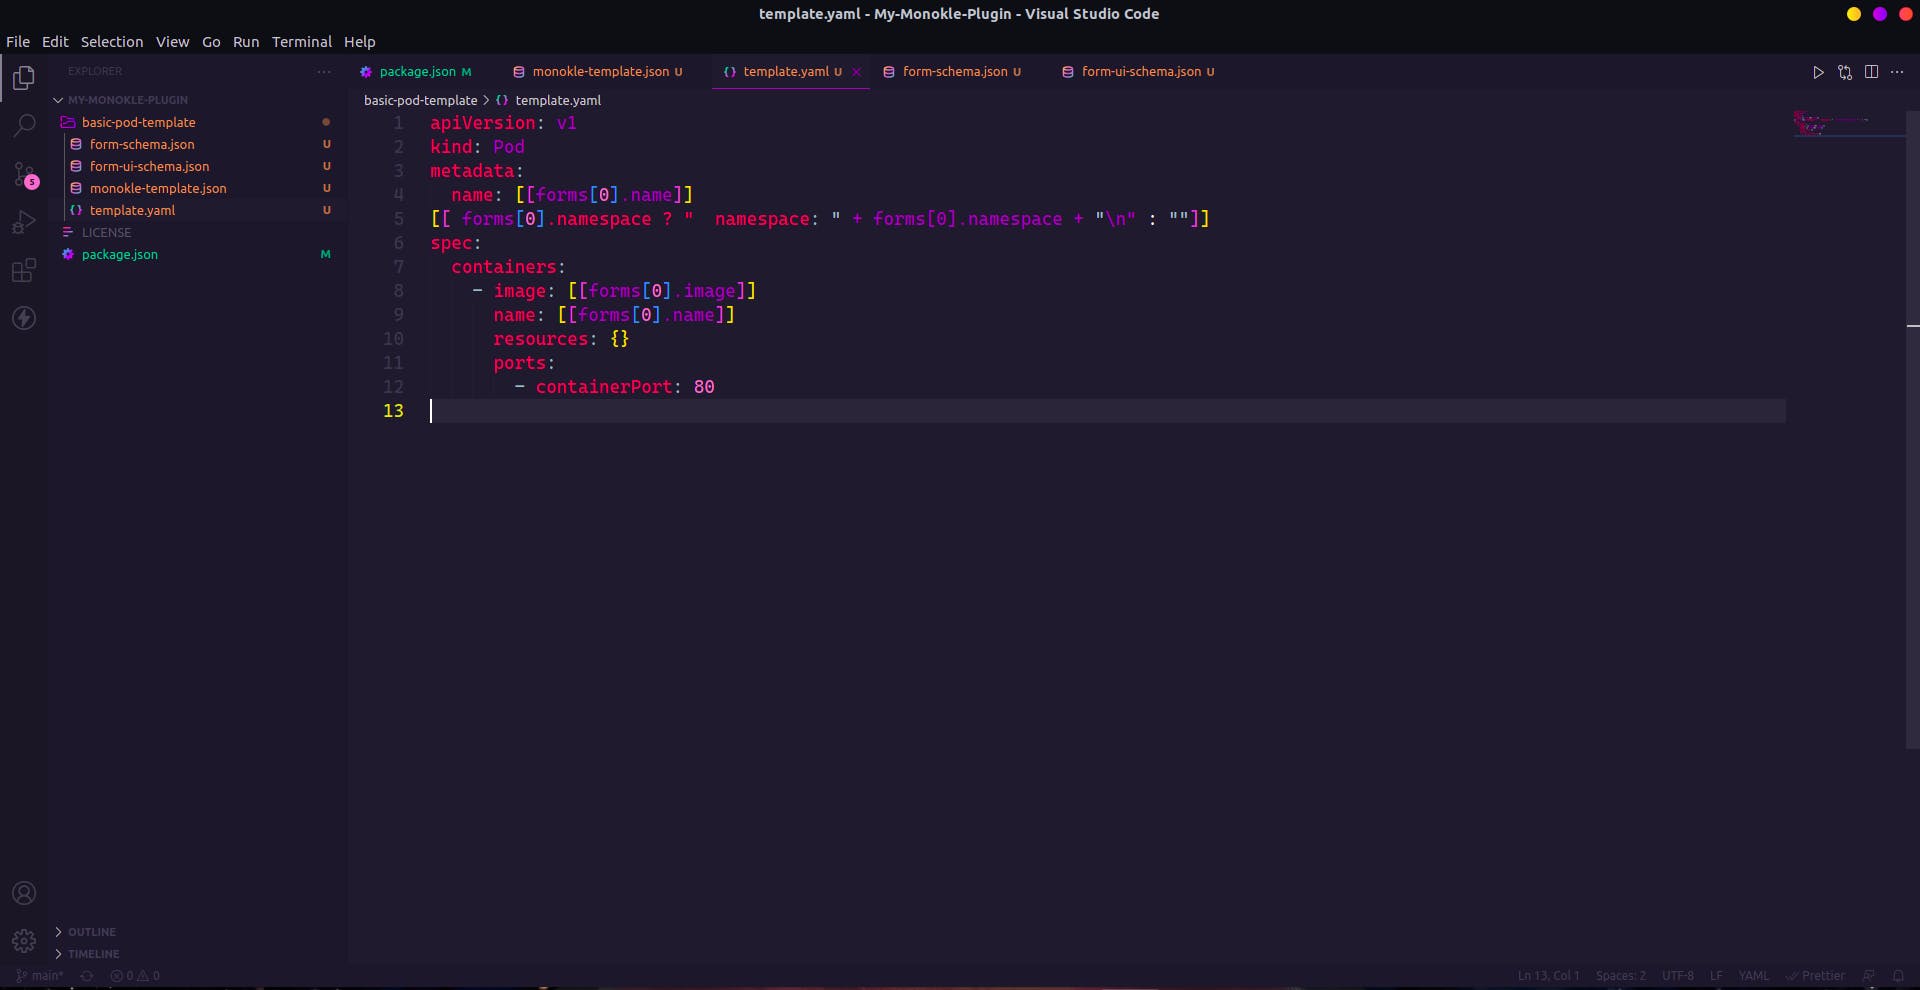
If you remember we were able to give an array of forms in monokle-template.json file since we can create a number of forms instead of a single big form for an object. But since here we only had one form that's why we used form[0] to get the data.
Also note that Monokle uses [[...]] as placeholders to interpolate form values and simple scripts written in JavaScript.
So, now we have created our plugin. Next step is to push our code on GitHub repository.
After pushing your code on GitHub, we finally wrapped up the creation part of the plugin. Now we have to install our plugin in Monokle.
Installing Your Plugin In Monokle
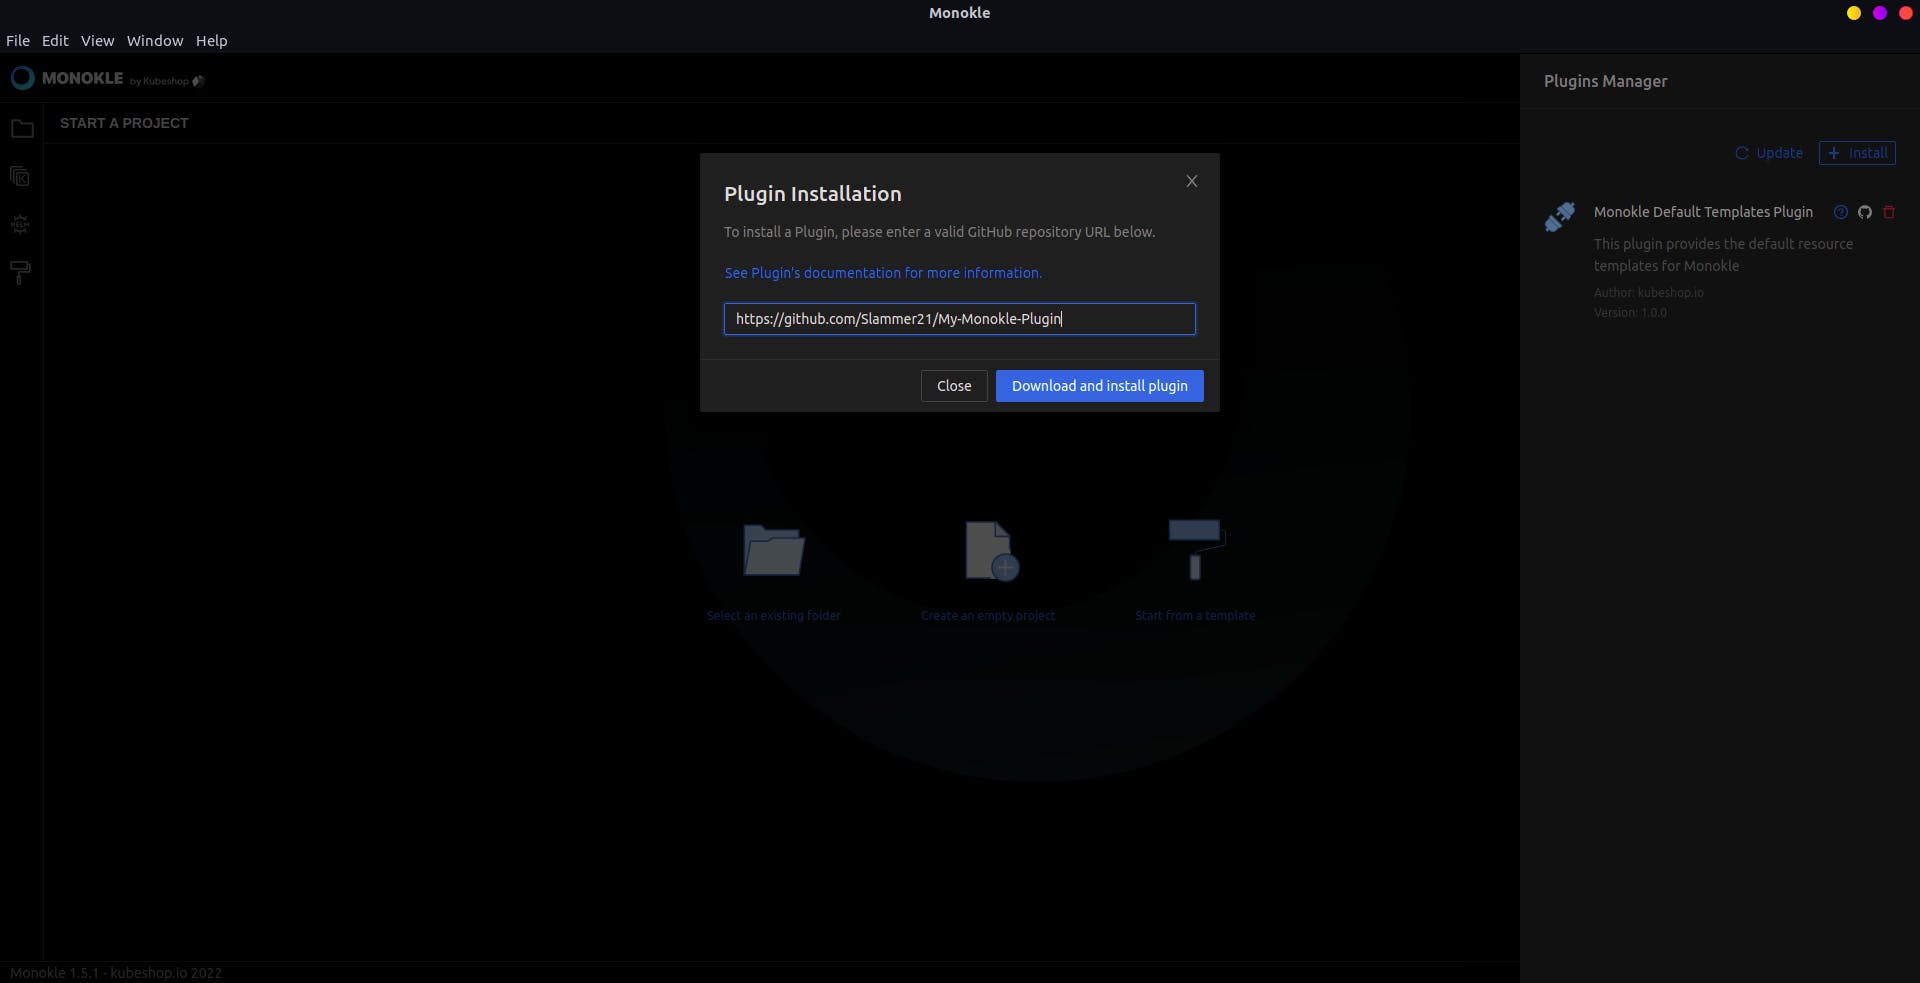
1. Open Monokle and then open plugins manager by clicking the icon of plugins manager on the upper-right corner then click on the Install button.
2. Enter your GitHub repo URL of the plugin you created in the form field and click on the Download and install plugin button.
Your plugin will be downloaded and installed as you can see from the plugins manager.
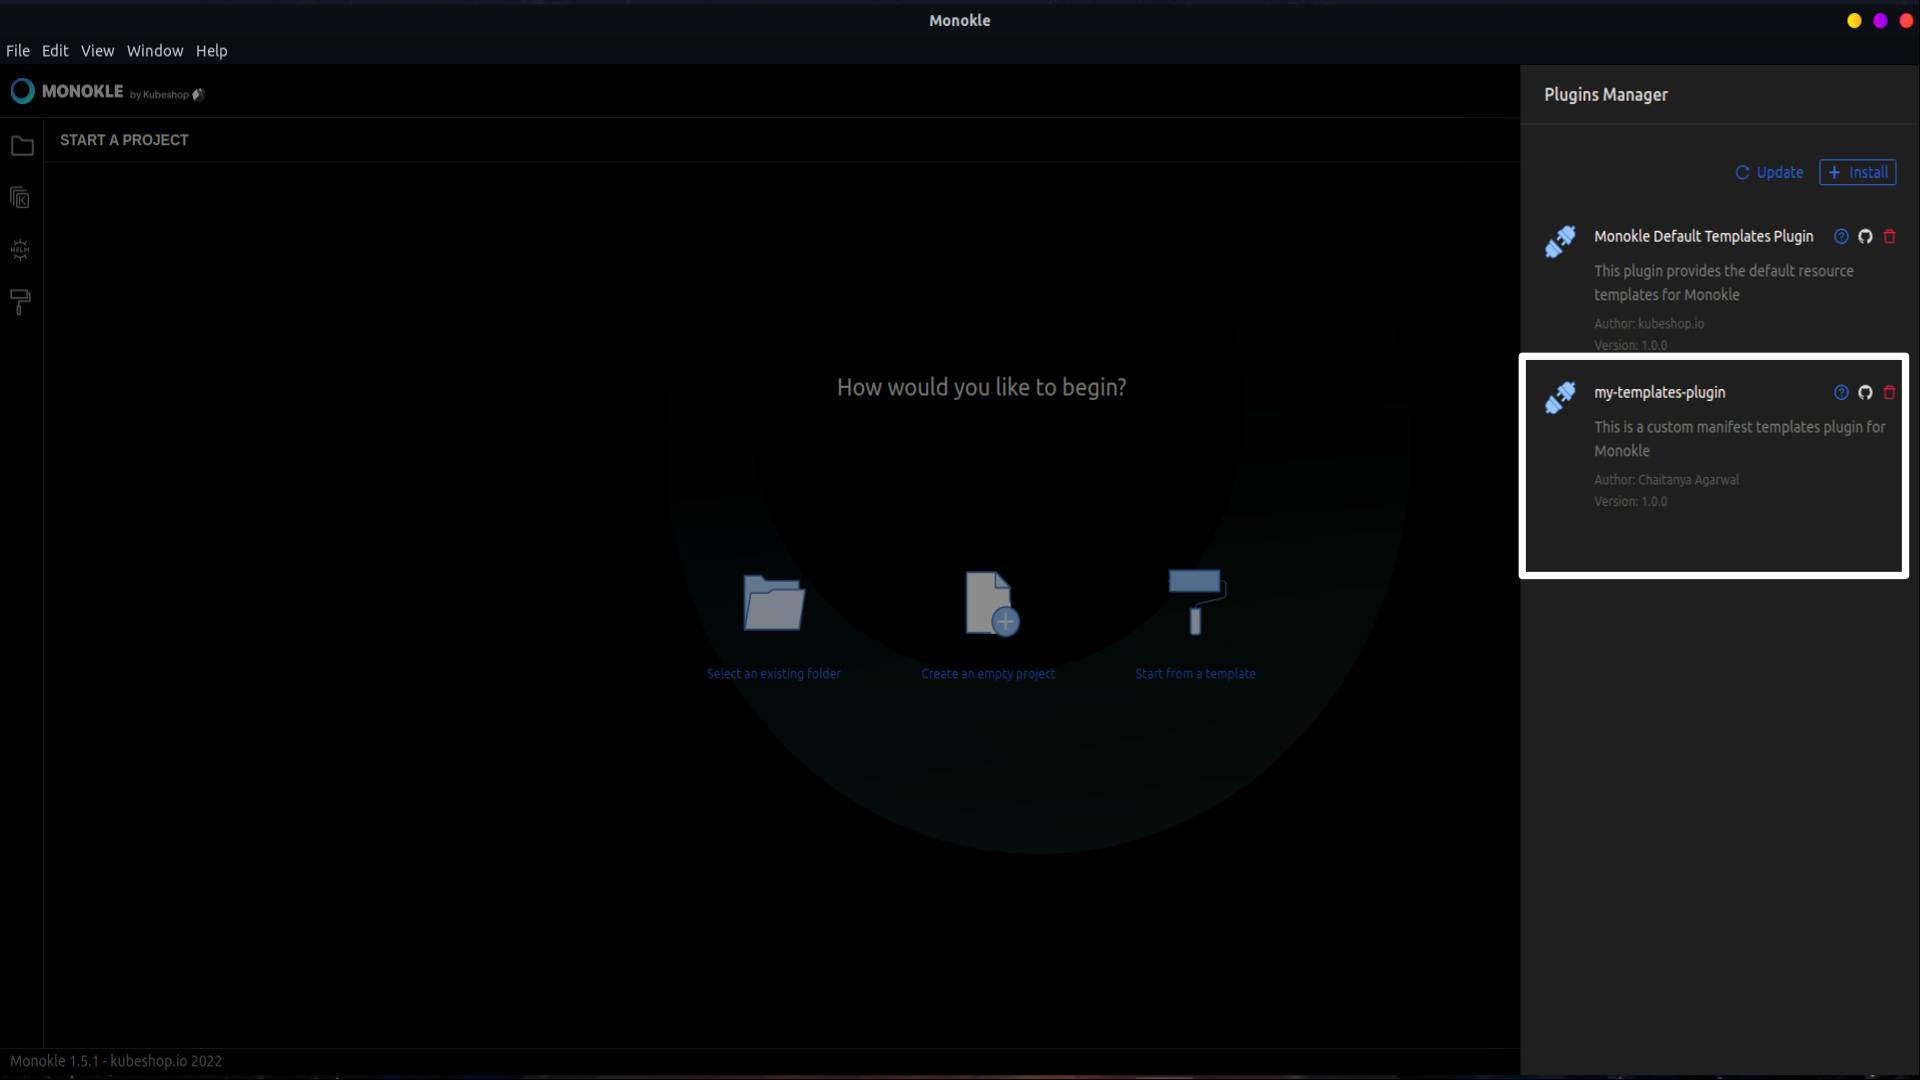
So, we have successfully installed our plugin. Now we can use it to create a manifest file using the template that we created.
Using Our Template
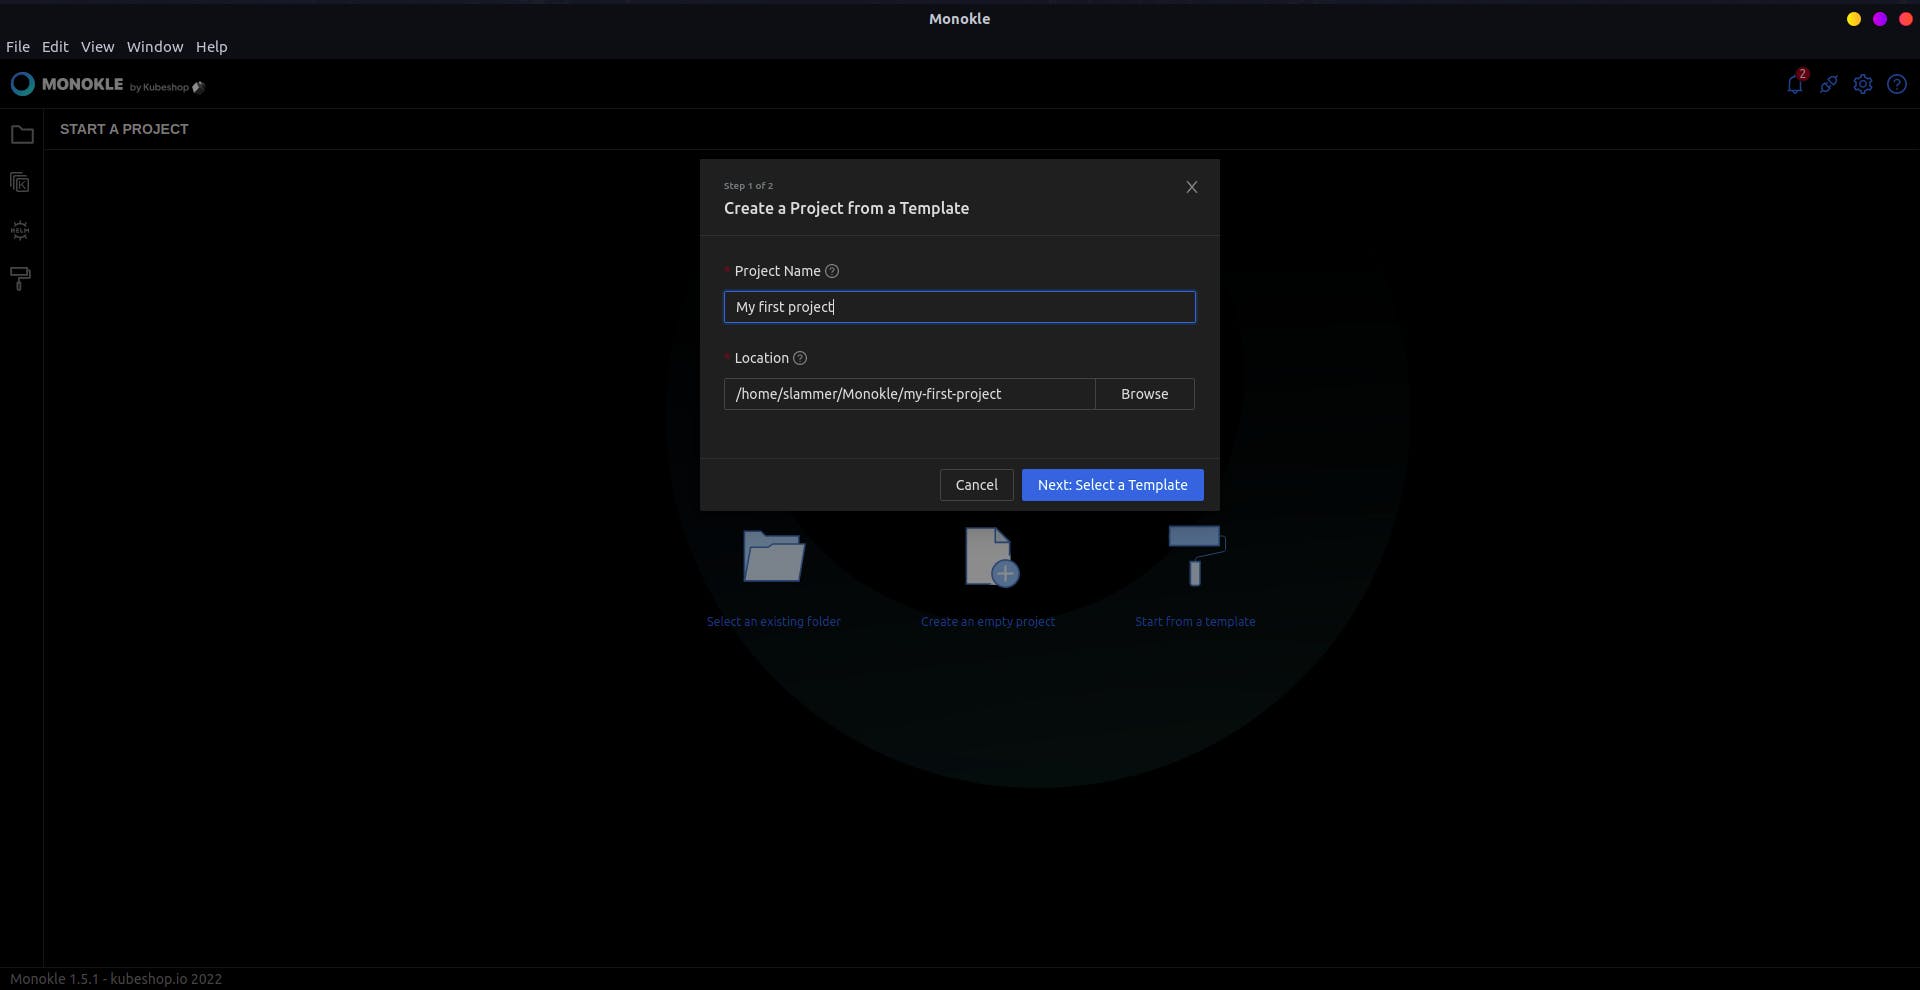
1. Click on the Start from a template button from the main screen of Monokle.

2 Now, enter the name of the project and the location where you want to create it in the dialog box that appears and click on the Next: Select a template button.
3. Now, search for your own manifest template from the list and click on Use Template.
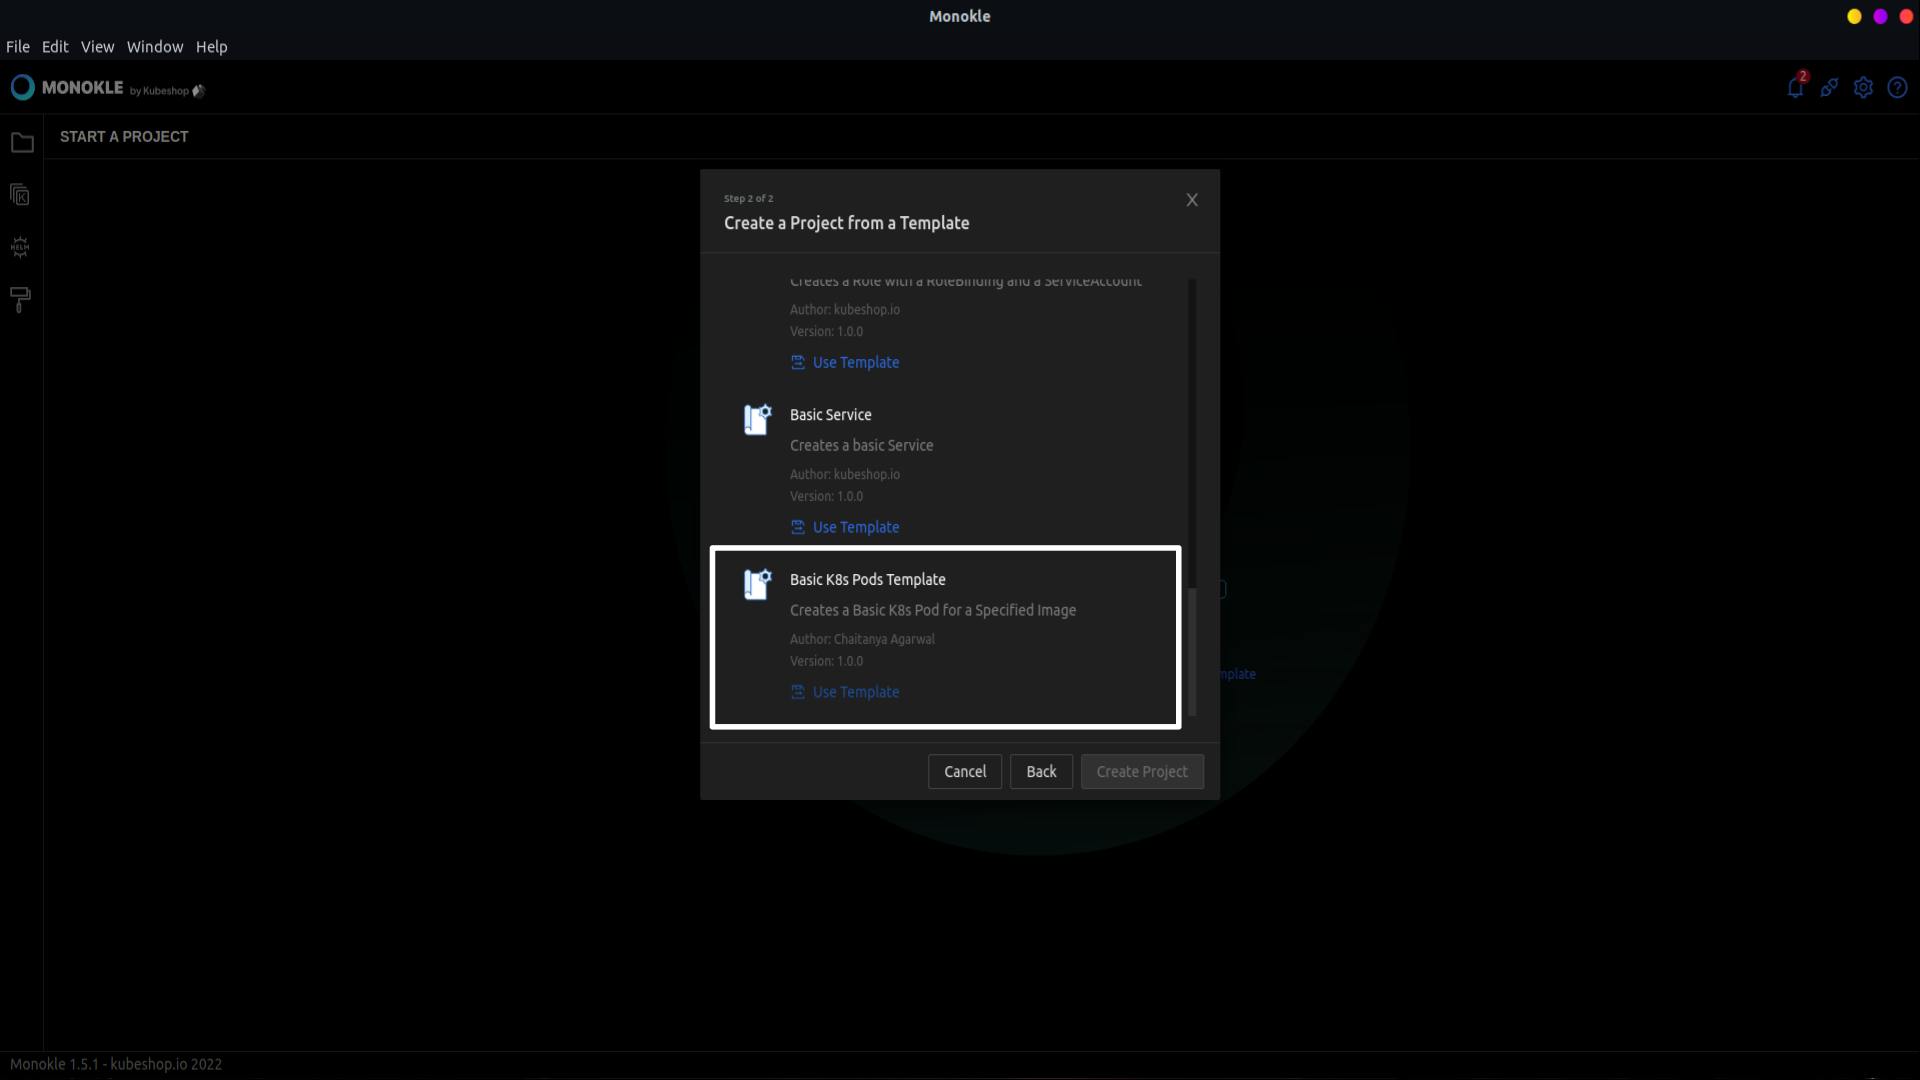
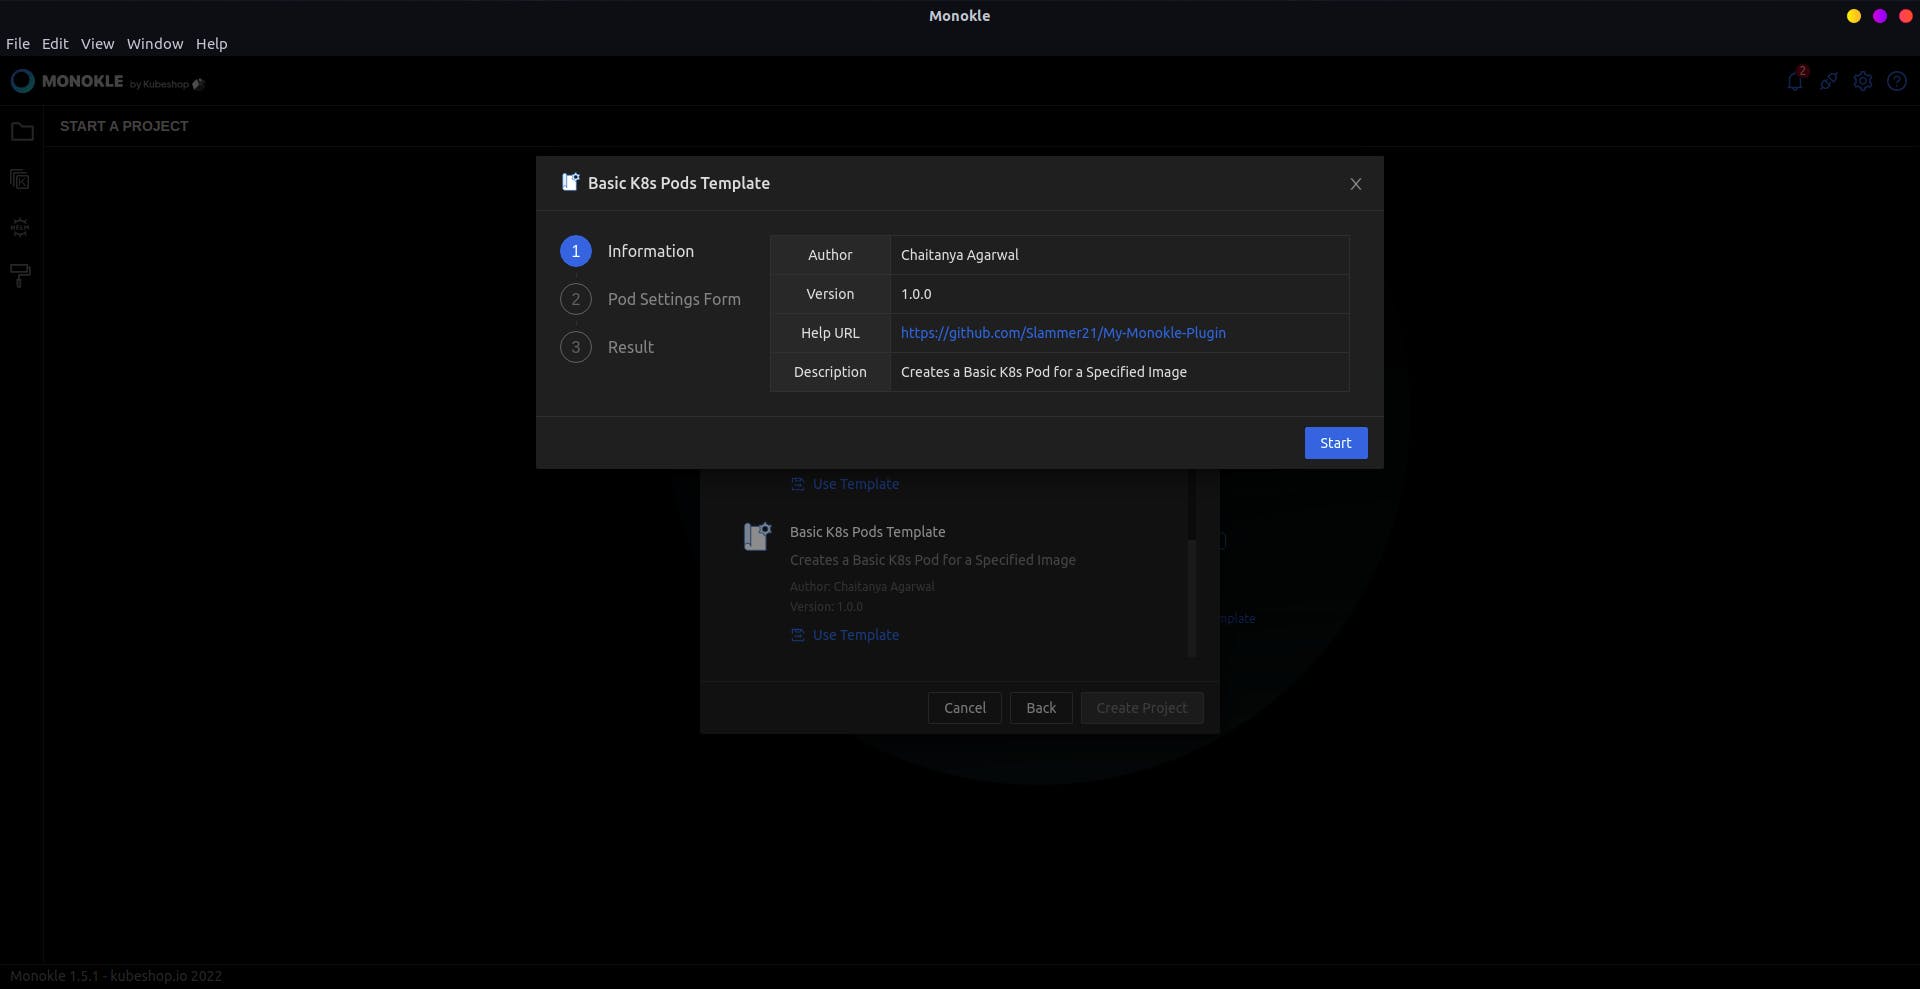
4. Now, you can see the author name, version, description, help URL that you entered while creating the template in the box that appears. Now click on the Start button.
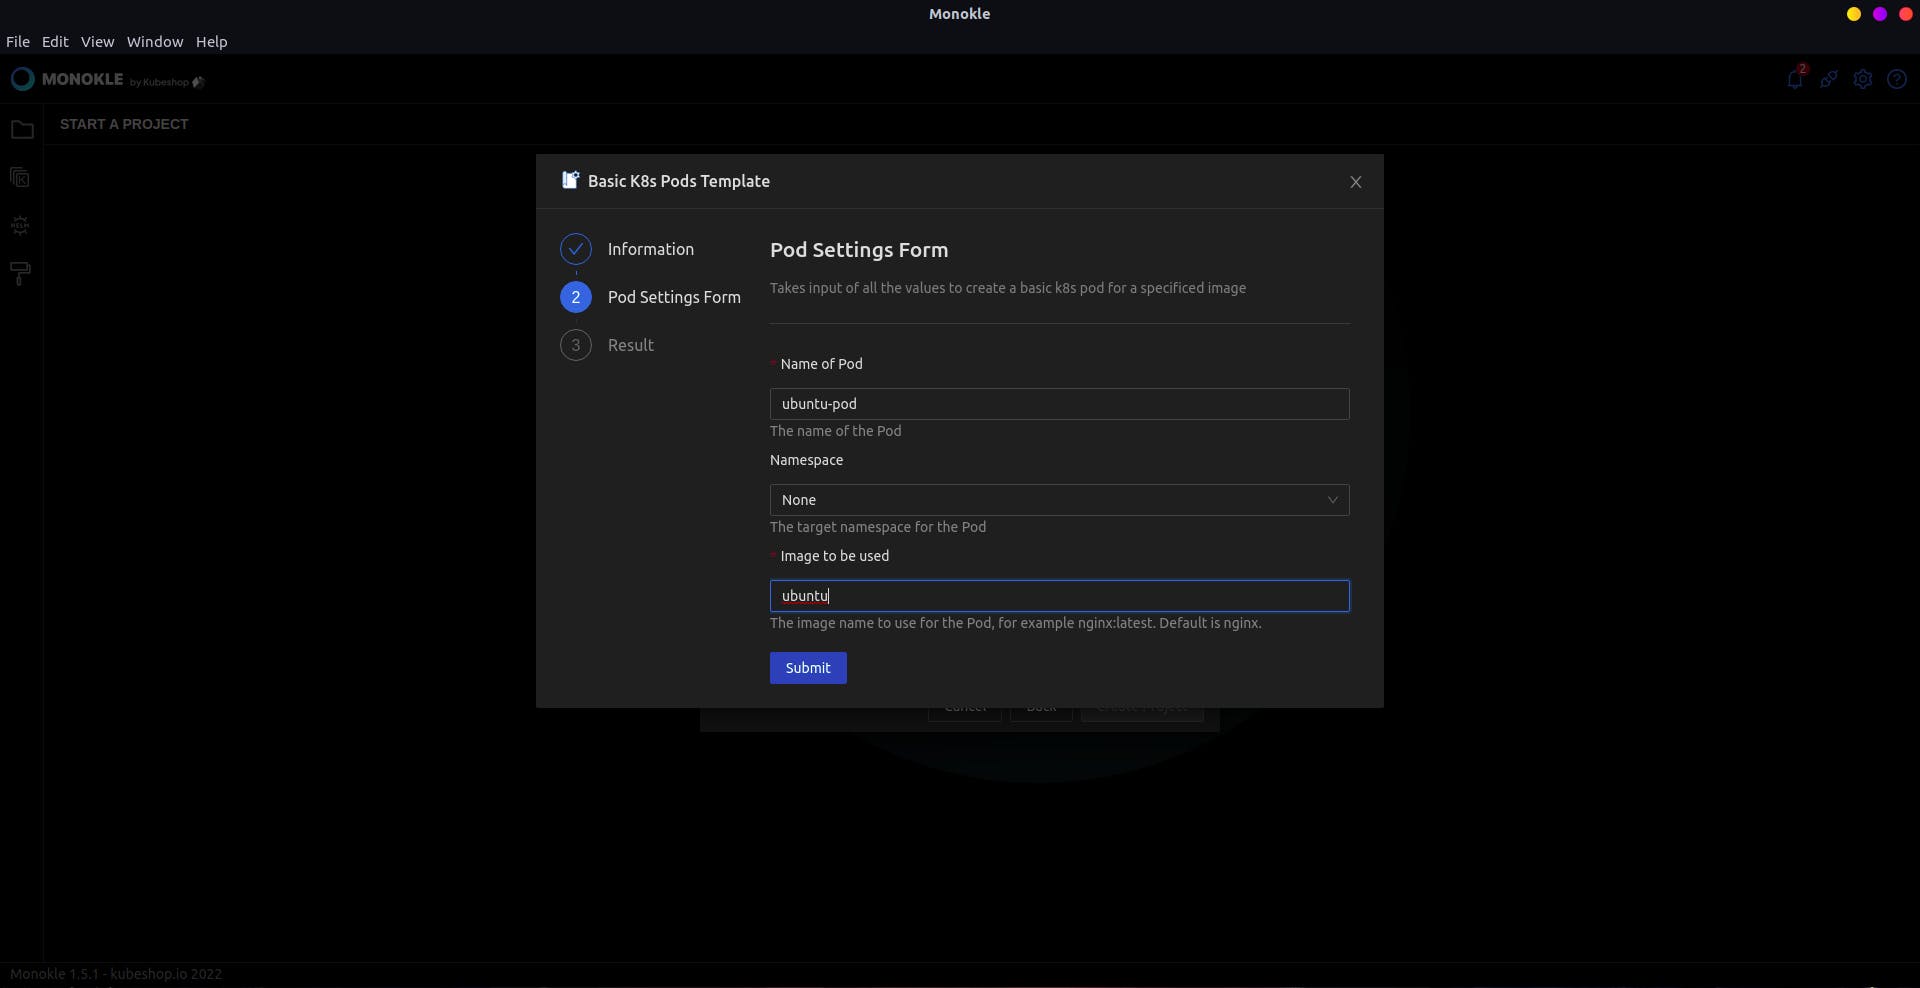
5. Now, enter the values of all the fields that you specified in form-ui-schema.json. In my case, it is pod name, namespace, and image to be used.
Then click on the Submit button.
6. Hurray!! You created your first K8s manifest file using your own template 🤩️🎉️. Now click on the Done button.
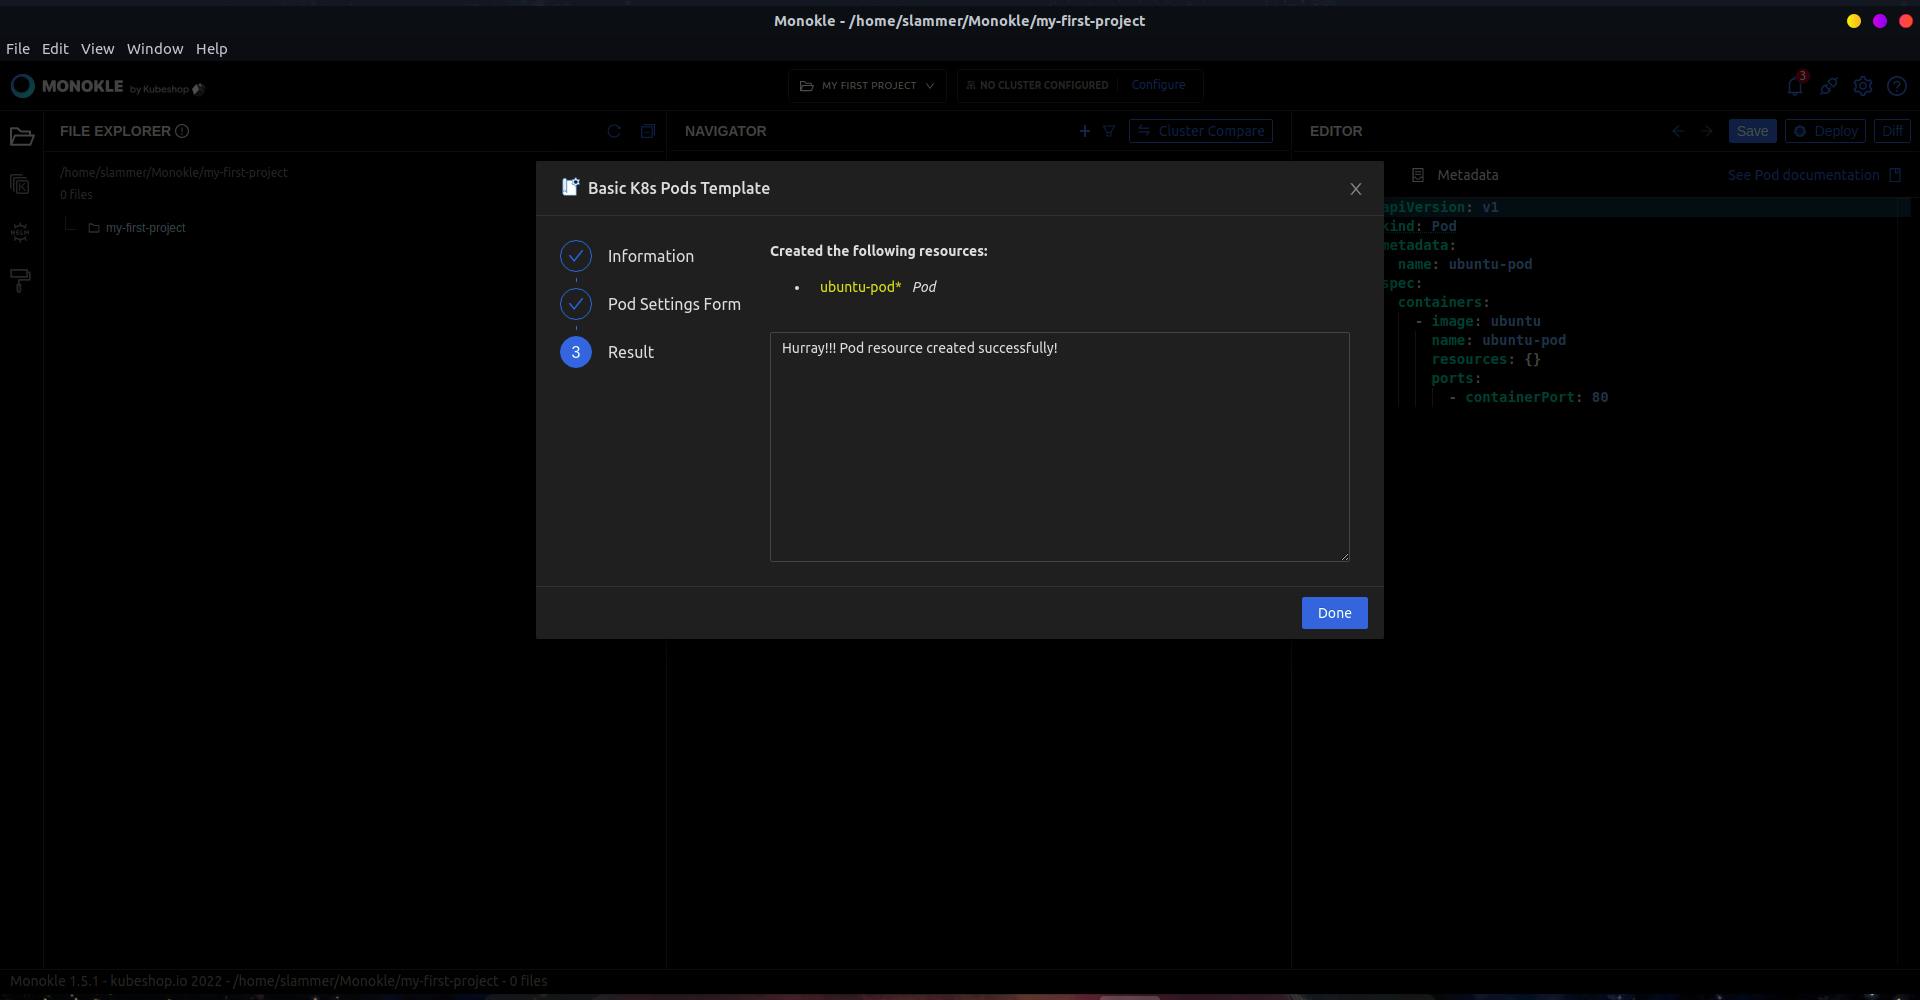
Congratulations on creating your first manifest file using your own template.
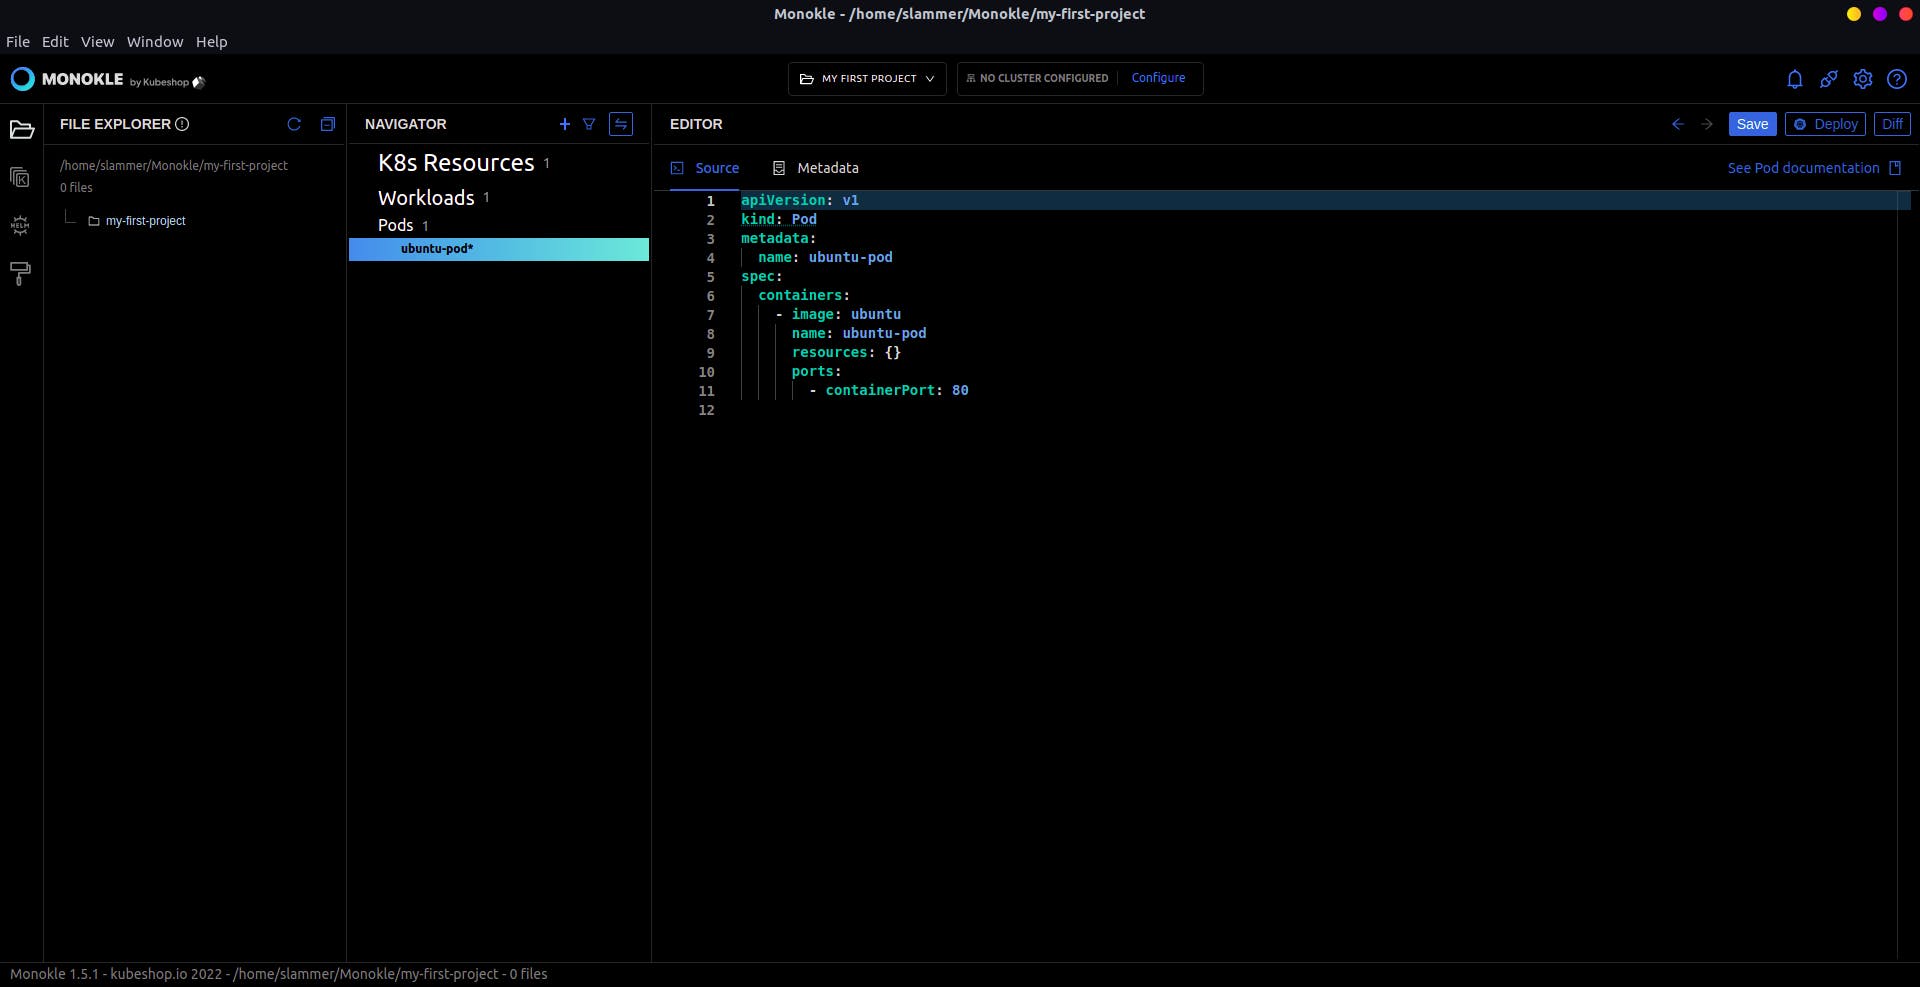
Now you can create more custom templates to use in Monokle and make your DevOps journey easier.
Wrap Up
The code for the plugin can be found on this Github repo.
Thank you for reading till the end.
Connect with me on:-
Twitter: https://twitter.com/Chaitanya_2002_
LinkedIn: https://www.linkedin.com/in/chaitanya-agarwal-4bb121186/
GitHub: https://github.com/Slammer21